

How To Repair Foggy Headlight Lenses
The concluding matter you need when you're driving in the rain, snow and fog of winter is dirty car headlights.
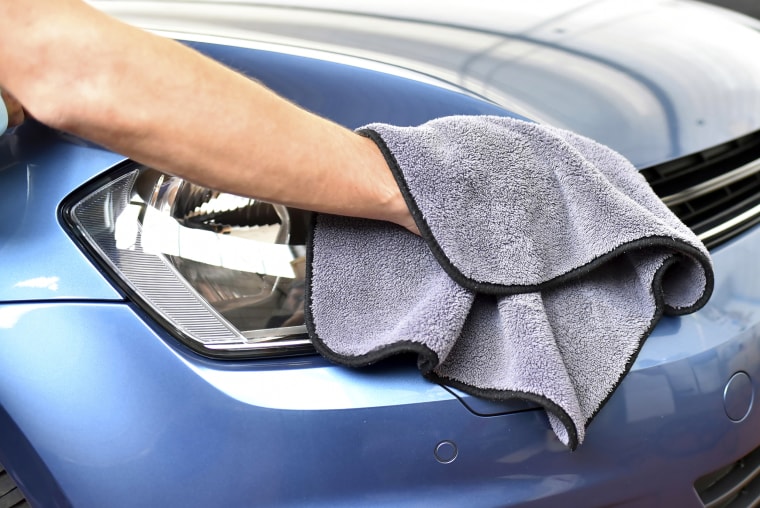
Before you lot spend hundreds of dollars replacing them, you should consider restoring them. You lot'll brand driving at night easier and safer — and save a few bucks, too.
According to Brian Noble, North America marketing managing director for Sylvania Automotive, two factors contribute to foggy headlights: route debris and UV rays from the sun. Both habiliment abroad at the protective blanket on headlights. To prepare the situation, the damaged coating needs to be removed and a new protective blanket added.
Although experts say you should bring your automobile in for a professional headlight restoration service, here are some of the most common DIY methods we've seen for cleaning headlights.
How to make clean auto headlights with toothpaste:
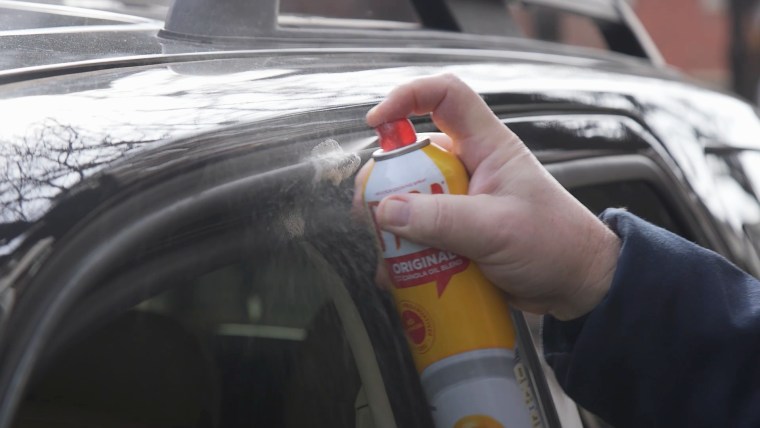
If the headlights are merely slightly foggy, y'all can try and restore them using an abrasive, similar toothpaste, and lots of scrubbing. First, clean the headlights with Windex or lather and water. So, using a soft cloth, rub a fingertip amount of toothpaste onto the wet headlight. (Toothpaste with baking soda works all-time.) Start scrubbing. Keep the surface wet and utilise more than toothpaste as needed. In one case you lot've removed the protective coating, apply a sealant.
How to make clean foggy headlights using a DIY headlight-restoration kit:
When choosing a restoration kit, wait for one that contains several grades of sandpaper, a plastic cleaner/shine, polishing cloths and a protective blanket. One kit usually has enough to clean two headlights.
Noble has the following communication when using a DIY headlight restoration kit:
- Follow the manufacturer's directions. Don't improvise.
- Don't blitz through information technology. Depending on how foggy headlights are, this could accept 15-20 minutes per headlight. Remember, you're rubbing away years of oxidation AND the original protective blanket.
- As you lot sand, run your hands over the moisture headlights. If you feel crude spots, sand until smooth.
- Exist careful not to scratch the car'due south paint while sanding. Some kits recommend taping around the headlights to help. Only exist careful: The tape itself may elevator off the paint on some older cars.
- Go on it wet. Use a spray bottle, a bucket of water or a hose to wet surfaces while sanding.
- Trust the kit. The headlights will look hazy later on sanding simply they'll be clear subsequently applying the coating.
- Make sure the headlight is completely dry earlier applying the protective sealant.
- Let the sealant to dry for several hours — better yet, overnight — before using the machine. You don't desire bugs or dirt sticking to your newly restored headlight.
- Some kits require reapplication of protectant every 1-three years, depending on weather, temperature extremes and if the car is kept within a garage or non.
Make certain to exercise caution when using DIY kits; if y'all're not too familiar with how to restore headlights, y'all could run the risk of ruining them completely if you lot use a kit, according to Alex Murenko, the owner of ONEighty, an automotive shop that offers headlight styling and restoration services in New York Metropolis.
"If they don't put the protective moving picture on in that location, people can restore their headlights merely vi months later, they're going to first yellowing again because the original coating from the manufacturer is already wearing off," he said. "Once you polish them, there's no more coating, and then at present y'all're dorsum to exposing the headlights to natural elements like rain, snow, the dominicus, the clay."
Get to a professional
Instead of tackling the job yourself, Murenko recommends drivers take their headlights restored by professionals.
"We'll lightly sand down all the yellowish and dust with a very fine sandpaper," he said. "When you sand information technology, it just becomes a matte cease. That's why afterward we accept to vitrify it and polish information technology. This restores the clarity and the smoothen. After we vitrify and polish, we put clear protection film on them to protect them from yellowing, from stone chips, from scratches."
The next fourth dimension you discover your headlights starting to get dull, go on these tips in mind!
This story was originally published Nov. 9, 2022.
Source: https://www.today.com/home/foggy-headlights-here-s-x-easy-ways-clean-them-t141713
0 Response to "How To Repair Foggy Headlight Lenses"
Post a Comment