

How To Repair A Commode Mounting Flange
So, your toilet is rocking, and y'all've tried tightening the toilet to floor bolts, but you nevertheless can't seem to get the toilet secured. Chances are your toilet flange (as well called closet flange) is broken or deteriorating because it wasn't installed properly. Although rather common, a damaged toilet flange must be repaired as soon as possible to prevent leaks that could crusade serious harm to your flooring or tile.
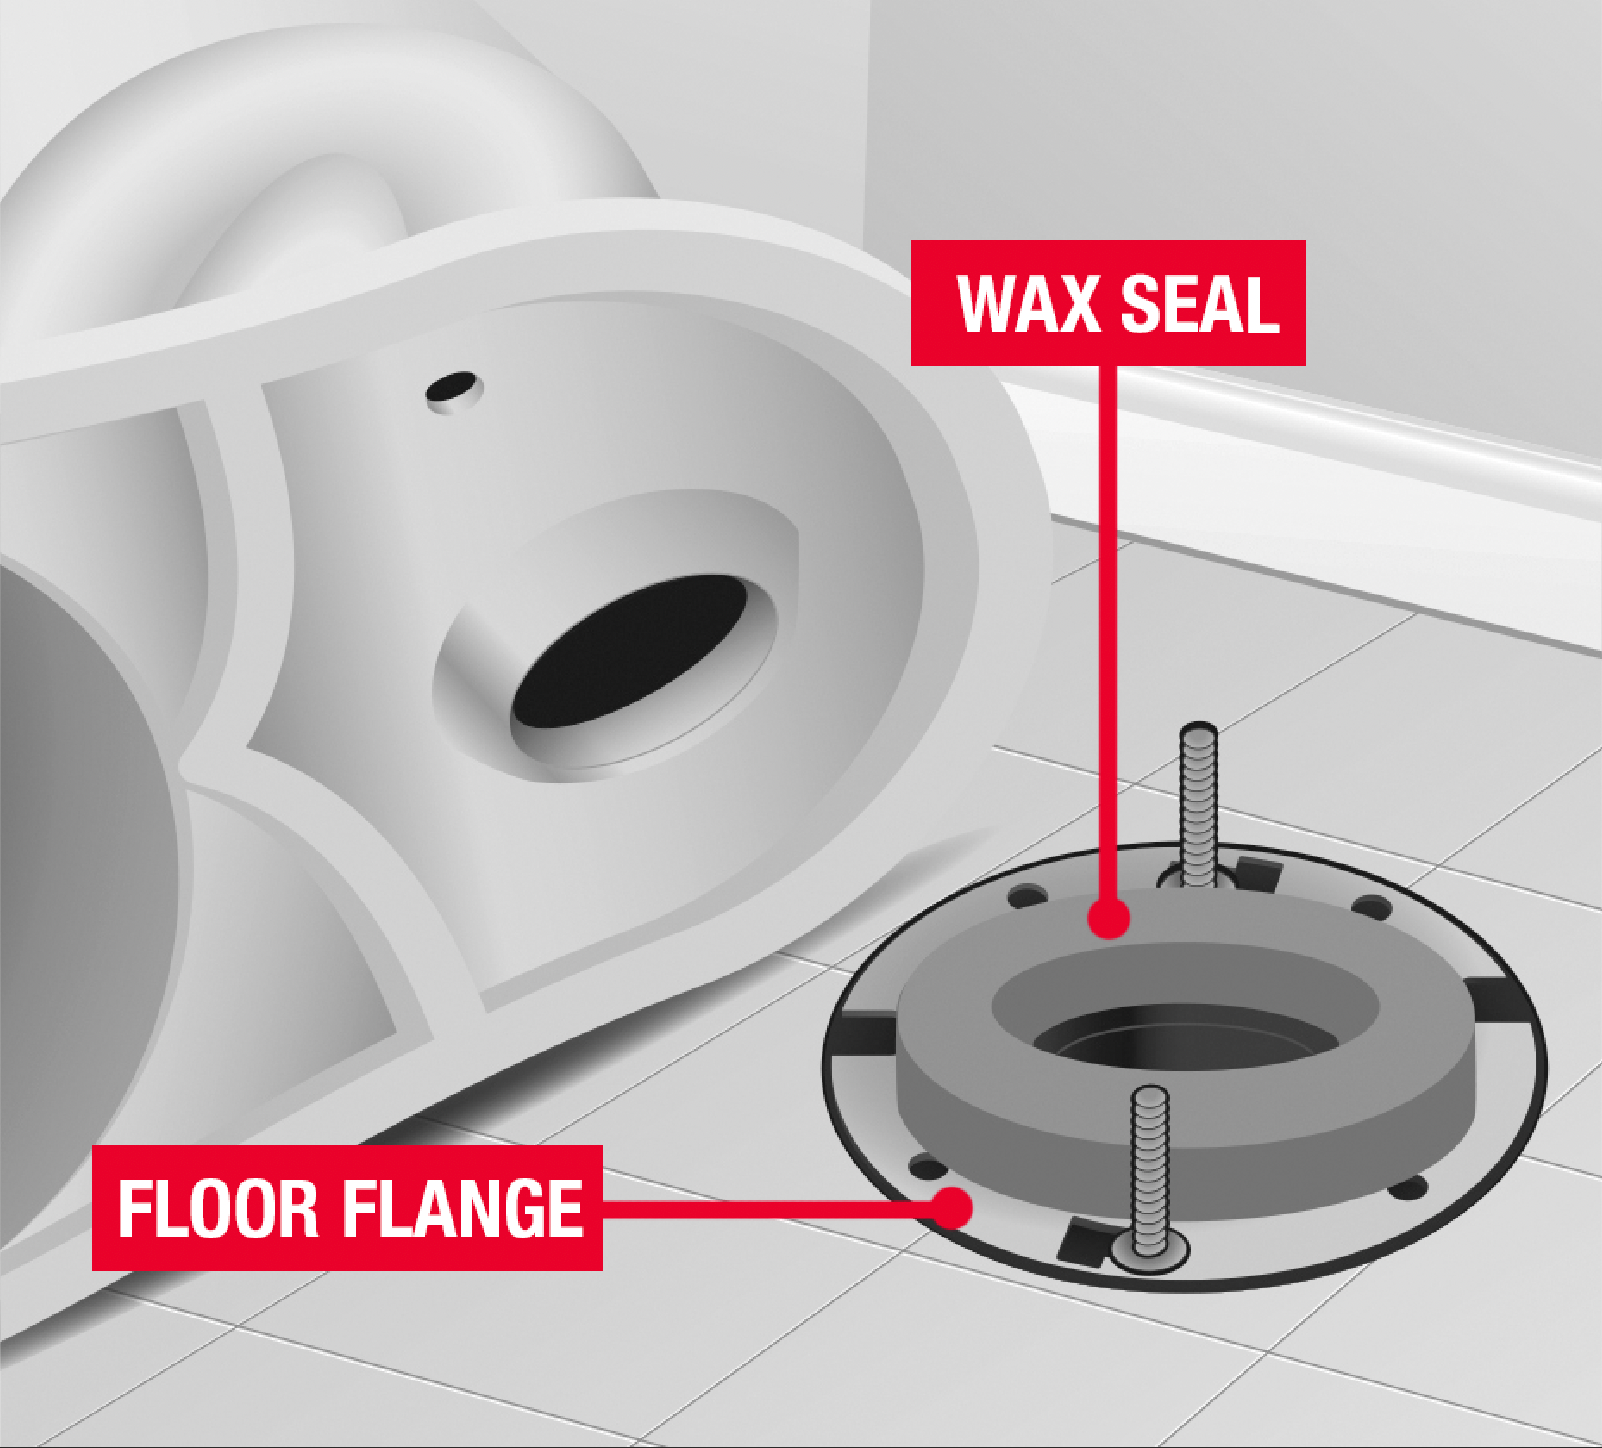
A broken flange will crusade the toilet to motion because it is no longer secured to the flange, which is anchored to the subfloor. The constant rocking volition likely suspension the wax seal (located between the toilet and the flange), allowing h2o to leak onto the substrate and the ceiling below when the toilet is flushed.
The good news? With the proper tools, a lilliputian know-how and a trip to the local hardware store, most people can finer repair their ain toilet flanges without breaking a sweat (or the bank!)
Toilet Flange Overview
A toilet flange is a pipe fitting that connects a toilet to the home's drainage system. It likewise mounts a toilet securely to the finished floor. There is a variety of toilet flanges to cull from on the market place today, such as PVC, ABS, bandage iron, copper and stainless steel, depending on your particular application needs.
Assessing the Problem
In addition to your toilet rocking, in that location are other warning signs that may indicate your flange is broken including:
- Visible leaks beneath the toilet
- Flooring surrounding the toilet feels soft
- H2o spots appearing on the ceiling located directly below the toilet
If any of these bug are nowadays, it'due south time to visually audit the toilet flange for impairment. Refer to steps ane-10 in the section below.
Prepping Toilet for Repair
- Offset, turn off the water supply to the toilet past turning the valve in a clockwise direction. The water supply valve should be located behind the toilet just to the left. If a valve is not nowadays, yous will demand to notice another valve located in the basement or crawl space surface area of the dwelling house.
- Remove the lid of the toilet tank and affluent the toilet. Hold the toilet handle downwards and then as much water as possible drains from the tank and the bowl.
- Use a water absorber, like LiquiLock , to temporarily solidify the remaining water, turning it into a gel, which volition assist forbid drips and leaks when removing the toilet fixture. The gel will deliquesce when additional water is added.
- Disconnect the water supply line from the toilet make full valve and the iii/viii" compression nut. This volition help when resetting the toilet afterward the wax seal (likewise chosen toilet wax ring) is replaced. You should always consider replacing the toilet supply when replacing the wax seal.
- If your toilet is caulked to the finished floor of the bathroom, score the caulking all the way around the toilet base with a razor knife.
- Place protective covering on the bathroom floor or bathtub, depending on where you lot volition be placing the toilet while repairing the flange.
- Remove the caps that embrace the bolts and washers. This can be done by inserting a flat head screwdriver under the edge of cap and gentle prying upwards. Be conscientious not to apply to much pressure on the porcelain because it may chip or crack.
- Remove nuts and washers from the bolts at the toilet base of operations using an adjustable wrench. If the bolt spins as y'all turn the nut, y'all will have to grasp the bolt with a divide pair of pliers while removing the nuts.
- Grab the toilet under the sides of the bowl and rock it gently back and along to break the sometime wax seal and lift the toilet off the floor. Set it down on the protective covering.
- Scrape the old wax seal off the base of the toilet and toilet flange using a putty knife. Scrape the caulk off the toilet basin and finished flooring.
Repairing Toilet Flange
What Y'all'll Need:
- Eye protection
- Gloves
- Screw gun
- Caulk gun
- Rust-proof screws
- Flange repair ring
First, inspect the toilet flange for any cracks or decay. If the drain department of the flange is damaged, a licensed plumber volition be needed to completely supplant the old flange. Flange selection depends on the type and size of pipe information technology is being continued to, as well as other application-specific variables.
Some flanges are specifically designed for cast iron connections, and others can exist solvent welded for PVC or ABS pipe connections. For new structure or remodels, there are flanges with knockout plugs that permit yous to exam the arrangement without having to use a exam ball or plug, while also keeping sewer gases from escaping.
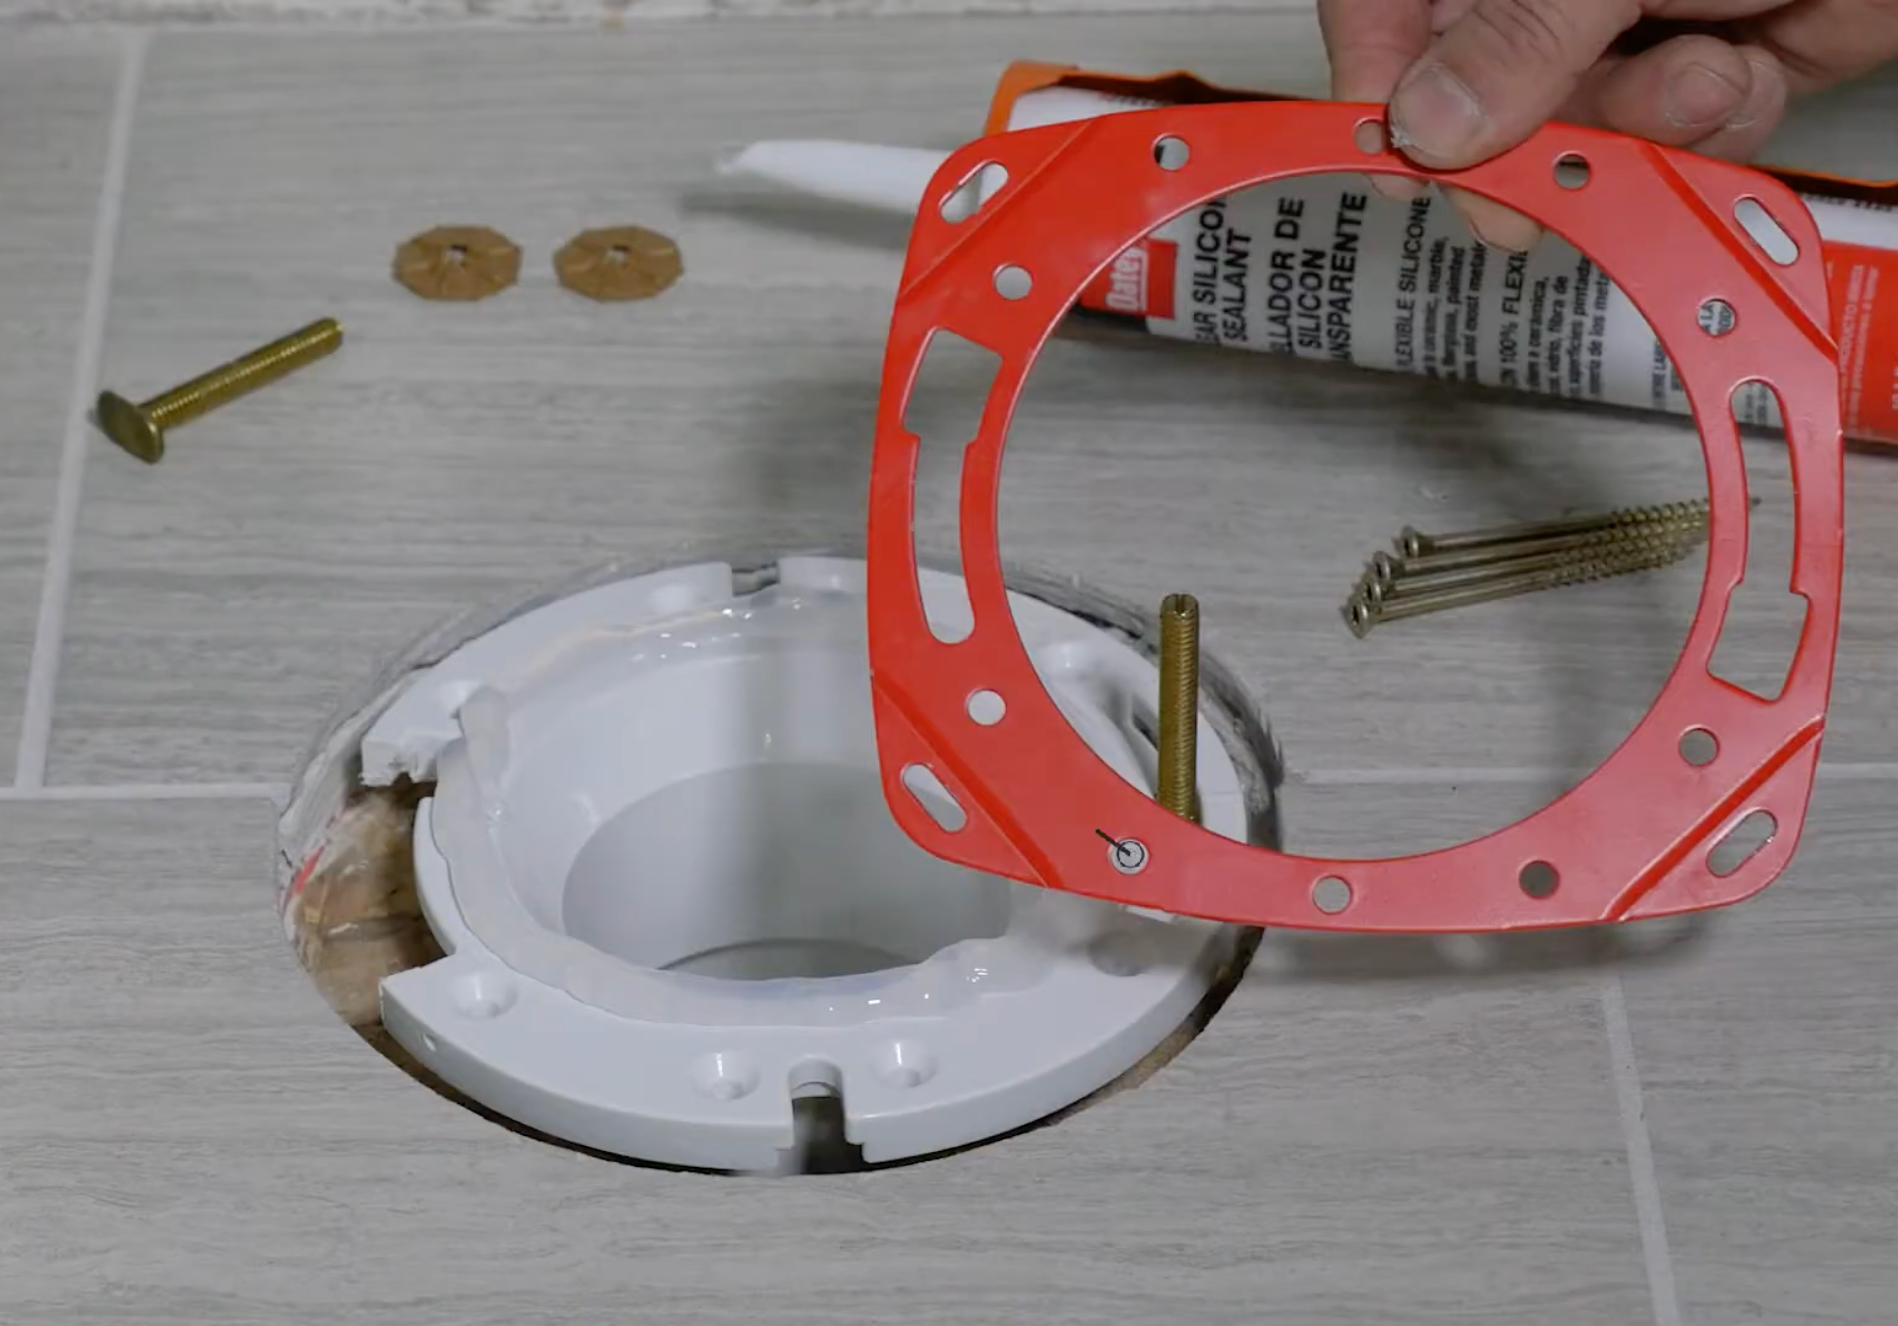
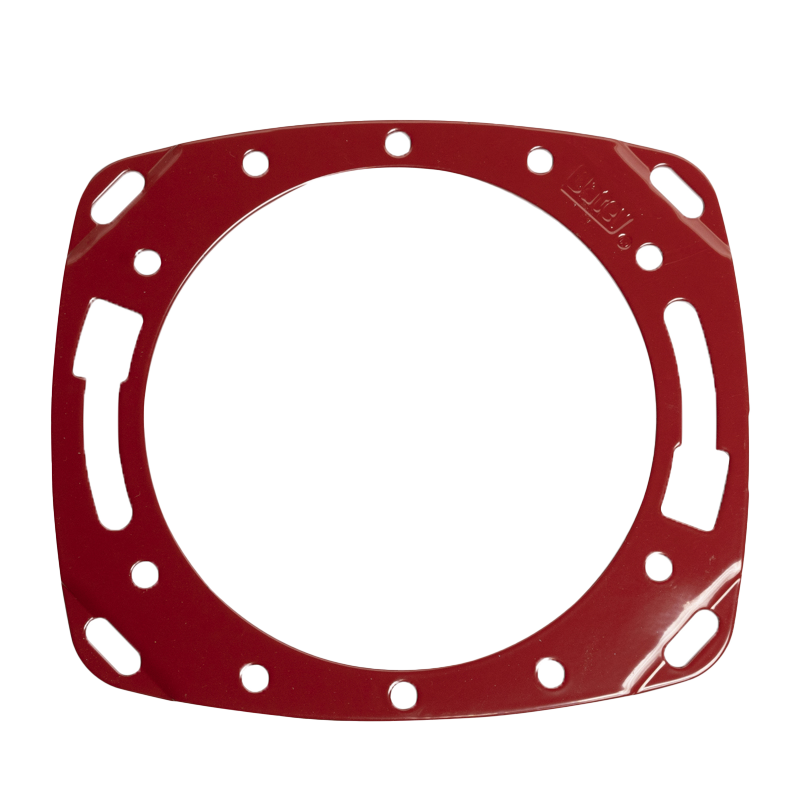
If just the flange is broken, you tin use a convenient flange repair ring, like Oatey's Fix-It Flange Repair Band, to securely reinstall the toilet. A product like this makes repairs piece of cake because information technology tin can be installed above the cleaved toilet flange with four screws and silicone sealant. It doesn't require solvent cementing or special tools to install, which is ideal for the average homeowner. For professionals, ease of installation results in a faster service call, saving fourth dimension and costs.
Follow these steps to properly repair your flange using a flange repair ring*:
- Remove broken or corroded sections of the flange. If pieces are loose, they can be removed by hand. So, employ a liberal amount of 100% silicone sealant to the peak of the existing flange.
- Inset new Johni-Bolts into existing band slots if still in identify . Exist certain the bolts are centered with the toilet flange opening and parallel with the wall backside toilet tank.
- Press the repair ring downward into the desired location for correct bolt alignment and secure the repair ring to the subfloor using appropriate screws and anchors.
- Secure Johni-Bolts to repair ring using supplied fasteners.
- Wipe off any backlog silicone and allow time to cure.
*Please read manufacturer instructions and recommendations on products to ensure best practices for safe and effective use.
Reinstalling Toilet
- Identify new wax band seal on pinnacle of repair band. Make sure it is centered.
- Reinstall toilet past using Johni-bolts (the bolts that connect the toilet to the floor) every bit a guide. Make certain you hold the toilet as level as possible when placing it onto the new wax seal. The toilet tank should exist parallel to the wall behind information technology.
- Do not stone the toilet as it is placed on the new wax seal. Use a slight side-to-side twisting motion until the toilet basin is resting on the bathroom floor.
- Install washers and nuts in their original order and location.
- Tighten nuts down while alternate from side to side until toilet basin is seated firmly and evenly on the floor. Be careful not to overtighten the bolts, or you could cleft the toilet basin.
- Connect toilet supply.

How To Repair A Commode Mounting Flange,
Source: https://www.oatey.com/faqs-blog-videos-case-studies/blog/how-repair-toilet-flange
Posted by: jimenezdidliverse.blogspot.com
0 Response to "How To Repair A Commode Mounting Flange"
Post a Comment